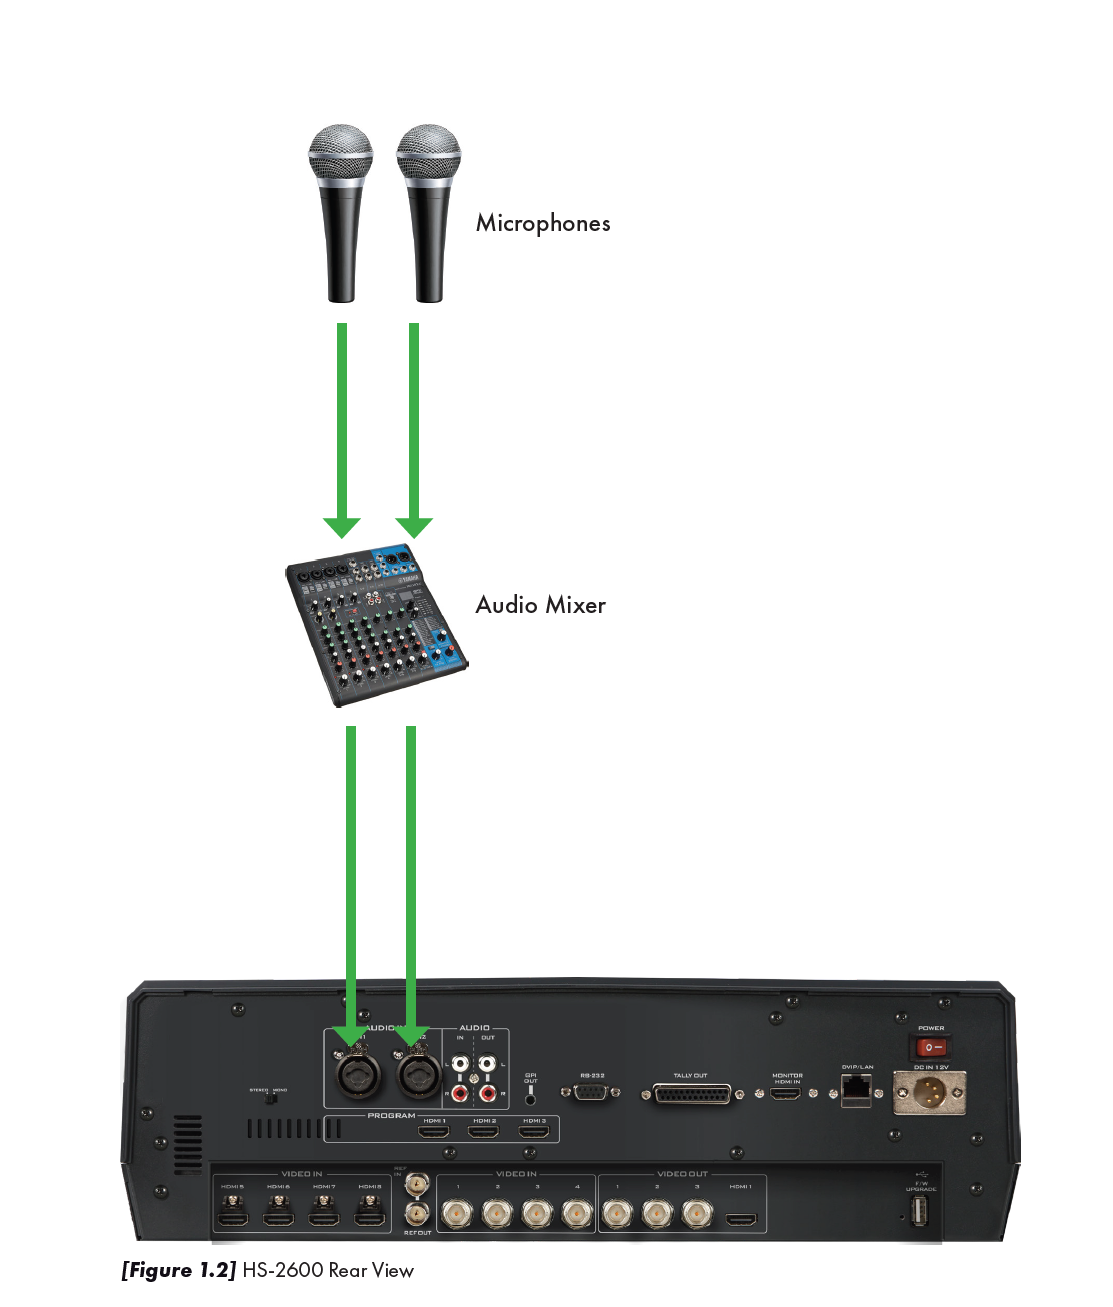
The audio mixer is a standard piece of equipment that is used in most video production set ups. The mixer performs a very important function by managing and mixing together all of the audio sources. The audio mixer takes in an array of audio sources including microphones, audio inputs from any type of peripheral equipment such as laptops, computers, playback devices, etc. It then will combine all these audio sources and send a mixed live audio output to the HS-2600 using XLR cables. Typically, each audio input has a volume control and other sound controls associated with it. This is called a channel. If you have a six-input audio mixer, then you can control the individual sounds of six different audio sources. Each channel comes with its associated individual controls for volume and frequency. This allows you to very specifically fine tune the sound for each audio input source you will have for bass and treble. It also provides a way for you to balance the sound coming from each source by adjusting the corresponding channel controls.
The MG-10 mixer has stereo XLR and TRS outputs for connecting to the HS-2600 and headphones or other monitor sources. It also has a 1/4” headphone output with level control for personal monitoring, as well as additional TRS 1/4” stereo monitor outputs for sending to powered speakers, amplifiers or devices such as digital recorders.
Microphone mixers use a variety of different types of connectors. Professional video production gear typically uses an XLR connector.
Audio Settings for the HS-2600
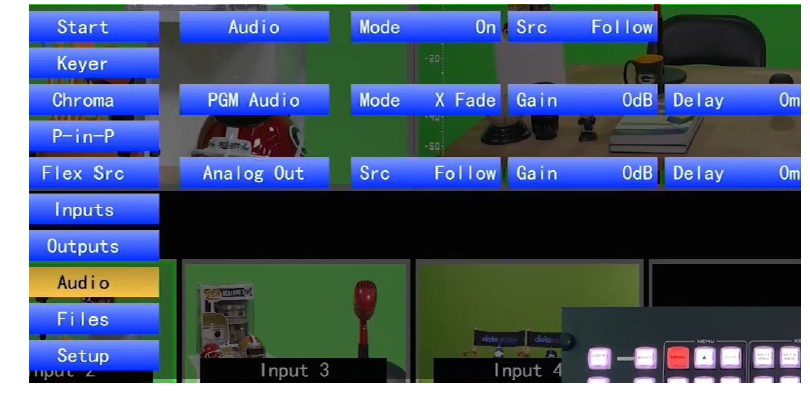
When you set up the HS-2600, you must make sure to have your audio channels turned “ON”. This is critical as the HS-2600 controls all of the audio and video feeds for each channel connected.
You can use the built-in menu on the HS-2600 to control the audio and video output signals.
Locate the “MENU” but ton on the HS-2600. Make sure your multi-view monitor is turned on and that you are seeing the preview screens. When you press on the menu button it will turn red and
you should see the menu screen pop up in blue.
If you do not see the menu screen, check to make sure everything is connected properly and that your output monitor is turned on. If you still do not see the blue menu screen you may want to
power the HS-2600 off and then turn it back on.
1. Using the up and down directional arrow keys located under the menu button, scroll down to the “OUTPUTS” configuration, the second to last option of your menu selections.
2. Press the “ENTER” key to access the output selections.
3. Scroll down to the “AUDIO” section using the arrow keys. When you reach the AUDIO section, it will light up in yellow.
4. Using your arrow keys, scroll over to highlight the “MODE” selection. Set the Audio Mode to ANALOG and the level to AUTO.
5. Next, while still in the AUDIO menu, scroll down and adjust the two SDI selections and the HDMI to: “ON”
6. Check all your settings and exit the menu. Your HS-2600 is now ready to process your audio signals. Remember that these internal audio settings on the switcher have nothing to do with your audio settings on your audio mixer, they are separate in functionality. What we just did was to tell the switcher that we will be feeding analog XLR audio inputs into it, and turning the audio channels to “ON” on the SDI and HDMI outputs. The output of your audio mixer typically feeds the audio signals to the HS-2600. The audio mixer connects to your HS-2600 via the two XLR audio input connectors located on the back of the HS-2600.