Audio is often the most overlooked element in video production. If your audience can't understand what is being said or if audio levels are too low, it can ruin a video production as much as poor lighting or poor camera work. In some cases, audio can be fixed in post-production, but if you are producing live streams, it's best to check all your audio gear before you start. Since audio gear is not included in the Datavideo bundles, we should point out some essential audio equipment needed for studio work and event productions. Here are some helpful audio tips for live video production:
Plan Ahead
When shooting on location, a smart videographer scouts the site before the shoot, looking for ideal lighting and backgrounds to produce the best image possible. For your next shoot, scout with your ears too. Listen for traffic noises, machinery, animals, and aircraft—anything that might ruin the audio during your live broadcast.
Depending on your venue, some ambient noise may be acceptable or even desirable. Just make sure you can hear your subject over the background noise.
Use an External Microphone
Rarely do you want to rely on built-in microphones from a camcorder. Your best option is to use external microphones connected to an audio mixer so you can adjust audio levels and apply basic audio effects before they connect to your video switcher. We will explore how to set this up later in the chapter.
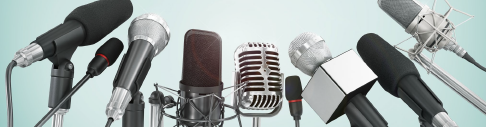
Choose the Right Microphone for the Job
Handheld Microphones – typically used by news reporters in the field, at sporting events, and for other remote productions that require direction in audio. For example, when interviewing someone at a sporting event, it is easier for the talent to point the mic in the direction of whoever is talking than to set up a lapel mic. Handheld mics can be wireless or wired directly to the audio mixer and mixed before going into your switcher or streaming encoder.
Lavalier Microphones – For morning announcement shows, news shows, interviews in a studio setting, or sit-down interview participants often use lapel, or lavalier microphones. Usually, these microphones are wireless, requiring a transmitter and a belt pack attached to the talent, and a receiver connected directly to an audio mixer, but they can also be wired. Be sure to check wireless audio channels to avoid conflicts in larger cities, stadiums, concert venues, and sporting events.
In most studio settings, you will use a lavalier mic kit. If you have two or more talents on set, you will need a lavalier for each person. In our Preface, we mention having at least two lavalier mics to allow for interviews, two anchors, or an on-set reporter.
Lavalier mics should be worn on the outside of clothing, attached to a lapel, tie, or shirt. However, hiding lavalier mics under clothes minimizes wind noise and visual distractions. This location guarantees a muffled sound and the sound of cloth rubbing on the microphone. If wind is the problem, try positioning your subjects with their backs to the wind. Some microphone kits include windsocks to place over the microphone to reduce wind noise. If cosmetics are the issue, try a smaller microphone and place it in a less distracting location.
Head worn Microphones – these microphones are typically used in broadcast applications and have a boom-type microphone that can be placed near the mouth of the announcer. Head-worn microphones are especially useful for loud venues, such as sporting arenas and stadiums.
Audio Headphones – It is always a good idea for one of your video team members to monitor audio levels with headphones. The headphone will be able to detect if the talent is loud enough, too loud, or if there is background noise picked up by the mics in the room. The headphone may be connected directly to the HS-3200 switcher or directly to the audio mixer using a mini-jack or ¼ inch headphone jack.